Showing posts with label coaster tutorial. Show all posts

Tuesday, February 11, 2014

Coaster Tutorial Part 2 0f 2


When we last left our coasters in progress we had finished painting the decoration.  Now we are ready to glaze and fire them.  If you missed part one of the tutorial see it here.   
Why glaze them you ask?  Because the glaze gives them the high gloss surface I love.
 
I use Duncan Envision Clear glaze - IN1001 glaze. This glaze is cone 06 and is lead free and non toxic.  I have tried Duncan's Pure Brilliance glaze, I find it hard to work with.
 
 The glaze goes on an opaque blue, but fires clear.  While this glaze is not considered a dipping glaze I often dip and pour this glaze on my other pottery pieces.  Here I am using a brush because it makes clean up of the bottoms easier.
 
I use a soft hake brush to paint on 3 coats of the glaze. The glaze has to dry between coats. When the final coat of glaze is dry to the touch I wipe off any glaze that may have gotten on the bottom of the coasters.  I wear gloves when I glaze because the glaze leaves a blue stain.  The stain is not permanent and will go away in an hour or two if I forget to use the gloves.
 
A hake brush is a style of brush made by a number of companies see an example here. 
 

Here are the coasters with the glaze on them and ready to go into the kiln .


It is always fun to open the kiln and see all your finished creations.  I just love that bright shiny surface. 
 
But we are still not done. Now we have to put the non-skid rubber pads on the back.  You don't want to scratch up your friends table tops. 


I get the non-skids from the same place I get my tiles and if I order 100 tiles I order 100 non-skids, that way I know I always have a non-skid for each of my coasters.


I sell the coasters in sets of 4, so as I am putting on the rubber pads I start to get them into their groups.


The coasters are stacked all facing the same way. We have put a lot of work into them and if we stacked them willy-nilly it would just look sloppy.  Now the groups of 4 are all set up and ready for the last step.
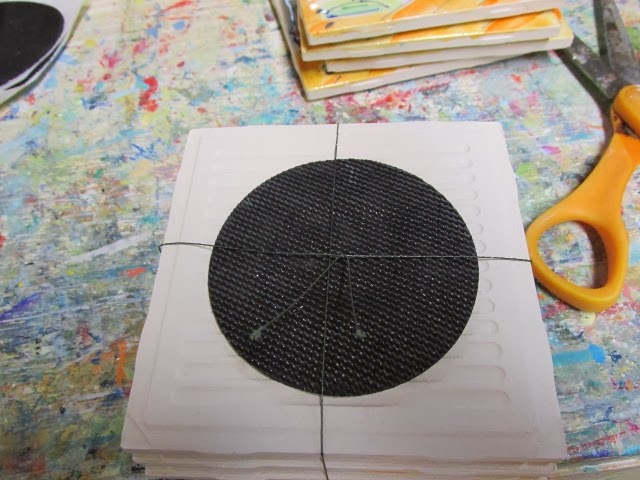


I use monofilament fishing line to tie the groups. The clear monofilament is almost invisible.  But for this photo I used a colored string so you could see it.  I put the knot on the bottom where it is hidden when the coasters are displayed.


And Voila, the coasters are finished and ready to head to their new home.
 
 
Note:
 
I have no affiliation with any of the suppliers I mentioned.  All of these products are available from a number of suppliers. There maybe suppliers closer to where you live, which might decrease your shipping costs.  And of course you can always "Go on the Goggle" to find these products.


Monday, February 10, 2014

DIY - a coaster turorial, Part 1

 
When I get a wholesale order for 24 sets of coasters, I have to get ready to sit down and paint and then glaze and fire 98 individual tiles. Like any project it is always more manageable when it is broken down into the individual steps it takes to finish the project.  If you have ever thought about painting your own coasters this might help you or give you a place to start.  If you don't work in clay or have a kiln you can paint with acrylic paint on the tumbled marble tiles you buy at the home improvement stores, or use glass paints to paint on glazed tiles.
 
I buy my unglazed bisque tiles by the case of 100 tiles.
 
I paint the tiles in groups.  My work space fits 12 tiles, and my paints and brushes. I am going to show you the steps I use to paint some of the coasters that Margaritaville Key West gets from me.  They have Jimmy Buffet song lyrics on them, so they are only available through Margaritaville.
 
The colors you see going on the tiles are ceramic underglazes they call Cover-Coats or E-Z Strokes by Duncan Ceramic Products.    The steps I am going to show you are the basic steps I use on all my pottery decorating.  However here I am decorating a store bought bisque tile rather than handmade greenware.
 
Bisque means that the clay has gone through its first firing.  Greenware is clay that is dry, but not fired.  If you added water to a greenware piece it would turn back into clay and you could use it to make something else.


The tiles get a quick sponge bath to remove dust and then the first color goes on.  Here I am laying in the shape of the wine glass with a few quick stokes. This Duncan color is Neon Green - CC205


The wine glass gets a highlight with a lighter green.  Notice that at this point I am not worried about being really neat.  The lighter color is Neon Chartreuse - CC203


Now the glass shape gets a blue highlight with a color named Blue Green - CC161.  I almost never use just one color on a shape.  I find layered colors richer and more interesting.


Next I block in the table top area.  The lighter orange and fruit on the glass is a Duncan product called an E-Z Stroke,  it is Orange - EZ 034. The accent stripes are painted with one of the Cover Coat colors called Neon Orange - CC204.


A light coat of Turquoise - CC133, is painted in as the background color.  Notice that I leave some white showing.  I like the look of some crisp white showing. I use a soft bristle brush. 


Next using Neon Red - CC206, I put in a little sailboat shape and that cute little umbrella we all want in our tropical drinks.


In this close up you can see the painting is really loose .  The next step is going add definition to those shapes.


I use a squeeze top to give me nice clean lines for my lettering and outlining my shapes. I like to use a metal tip that I buy from my ceramic supply house. Duncan Bright Blue CC159 is the color I use here.


I buy my colors in pints whenever I can.  Here you can see that it is time to stop and fill up that little squeezie bottle.


Most of the outlines I do in the Duncan Cover Coat, Bright blue.  I outline the fruit on the drink with an E-Z stroke called Coral - EZ057, and add a little accent of E-Z Irish Green -EZ003, on the glass.  I buy some small little squeeze bottles and the caps just happen to fit on these E-Z bottles.

Where to buy the tiles and Duncan products?  The bisque tiles are heavy and I recommend you try to find a supplier close to you.  I buy mine from Axner Pottery in Florida. I buy my Duncan products from Miami Ceramics and New Mexico Clay.

How do fight boredom when you are doing the same thing over and over?  I listen to books on tape or listen to Pandora or some other thing on my I-Pad.

Next the tiles need to be glazed and fired.  I will show you that in part 2 of the tutorial.
See it here.

Related Posts Plugin for WordPress, Blogger...