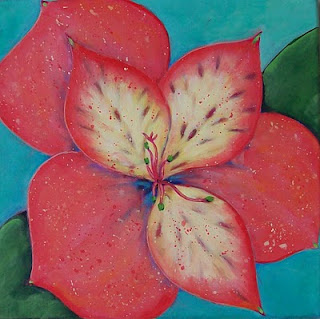
Last Thursday's painting class was a lesson on dry brushing. I thought this class would be very good for me because I tend to paint with a really loaded brush most of the time. So I was painting and I was painting with almost no paint on the brush and just not getting the effect I wanted. It looked stiff and way too regular. So I decided to go for thin layers of color in just the opposite way, glazing. I loaded my brush with very wet, very thin paint and started applying different colors in very thin layers. I have one of those heat tools (best $20 investment ever) and I could dry the layers in a hurry. I was much happier with the the result. And then I decided to do some selective splattering and then some more glazing to tone down the splatters and then a few thin edge lines to give a subtle indication of a light source. I am really glad I tried the dry brush technique and there may be times I want to use it, but it wasn't working for me this week.
My instructor, Jim Salem is a master of dry brushing. One look at his work and you will understand why I want to be able to do it also. One short note: Jim did say that I was working on a canvas that was very smooth and dry brushing works better on a canvas with a little tooth. So I think I'll blame it on the canvas.
Now I just have to make a simple edge strip frame and take it into the gallery.
12" x 12" acrylic on canvas

It is absolutely beautiful - why do you tempt me like this? Again - just beautiful! Just came back from the nursery and bought so really fun lily bulbs......
ReplyDeleteWhat a great tip of layering with glazes--thanks for the inspiration!! I love the outcome!
ReplyDeleteThanks Tom, what kind of lilies?
ReplyDeleteDiane, thanks, I love all the cool stuff you got over the weekend.
hello Maggie, thanks for stopping by my blog.
ReplyDeleteI see you are an acrylic painter-- I myself started in watercolor 30 years ago, eventually ending up with acrylic and now collage and assemblage-- I just go with the flow. nice work here.