
.jpg)
I have just finished a mural on a powder room wall in old town Key West. The house is a new build in a compound and has an existing cottage on the property. The interior was getting its final touches the days I was working.

I had met the owners and seen the house in progress in November when we first started to discuss the project. Isn't that cottage cute? And a small plunge pool right off the living room, wonderful.

After our initial meeting the owners and I decided that the next step would be for them to decide on a motif based on images of my past work. I set up a page for them on this blog (the remnants of it are still here, called for the Larsens) and uploaded all kinds of past paintings. I knew that some of them wouldn't work, but there was also color to consider so I wanted them to see a lot of choices. When they decided on motif and color scheme I did a sketch on
22"x 30" 300lb watercolor paper. They approved the sketch, my price and dates of work. Next step was for me to select colors. I painted the mural in the same brand of paint that they used for the interior, Benjamin Moore. They choose a pebble finish for the walls, but I painted in flat. I didn't want any texture or sheen. Looking at color chips took way more time then I thought it would. I looked at colors before I painted the large sketch and selected colors I thought would go with the colors on the other walls in the room. Then after the sketch was finished and approved I took the sketch with me to the paint store and selected the main colors. In the end I got some great colors and I ended up with some primary colors that really mixed well.

I taped the wall edges, put plastic on the floor and then installed a cardboard floor so I wasn't slipping around on plastic. That was one of the best moves I made.

I rolled the sky color and then brushed a darker blue in the upper left hand corner to give the sky a shift in color from right to left. Next I brushed in the background water, background sand and started in on the shadow areas. That's when I realized I had made a mistake. I had planned to mix a lot of colors on sight because I wanted them all to work with the lighting that was in the room. It is a very small and dark powder room. I was working out of the quarts of paint and mixing colors from them was going to be a nightmare and huge mess. I went to the restaurant supply store and got numerous squeeze bottles. One for every major color I thought I would mix.
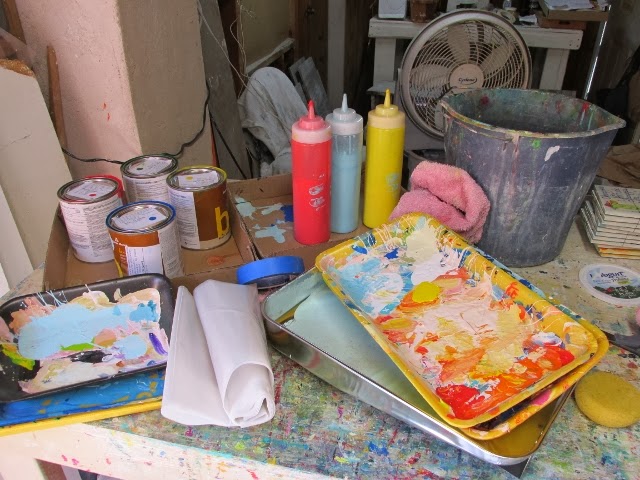
I took all the paints back to my studio and spent the rest of the afternoon mixing colors.

They were easy to work out of and transport. It made day 2 of the mural project much easier.
See you day 2!

Magnifique et colossal travail de transformation!
ReplyDeleteLovely post!
Thanks & Welcome for your comment and your visit to my blogs.
Have a nice weekend.
Cath
Thanks Cath, it came out great.
DeleteThanks for sharing your process...can't wait to see the finished work! Squeeze bottles...what a great idea will have to remember that one!
ReplyDeleteI got the squeeze bottle idea from taking Rick Worth's classes.
DeleteWhat an exciting project, Maggie! Can't wait to see the next step!. Happy painting! :)
ReplyDeleteThanks Helen, I learned a lot.
DeleteMaggie, Great project ... love how you solved your problems with the squeeze bottles! Wow, that home is going to be beautiful with that plunge pool is amazing! Will be looking for photos!
ReplyDelete